前两年一直在用hexo写博客,hexo构建需要node环境,且文章数量多了以后构建速度慢了许多,且部署起来比较复杂,所以改用hugo。
在Mac系统使用hugo推荐使用homebrew安装hugo。homebrew的安装不再介绍,可参考
知乎文章
安装hugo
生成站点
1
| hugo new site /path/to/site
|
创建文章
hugo new about.md
使用next主题
链接
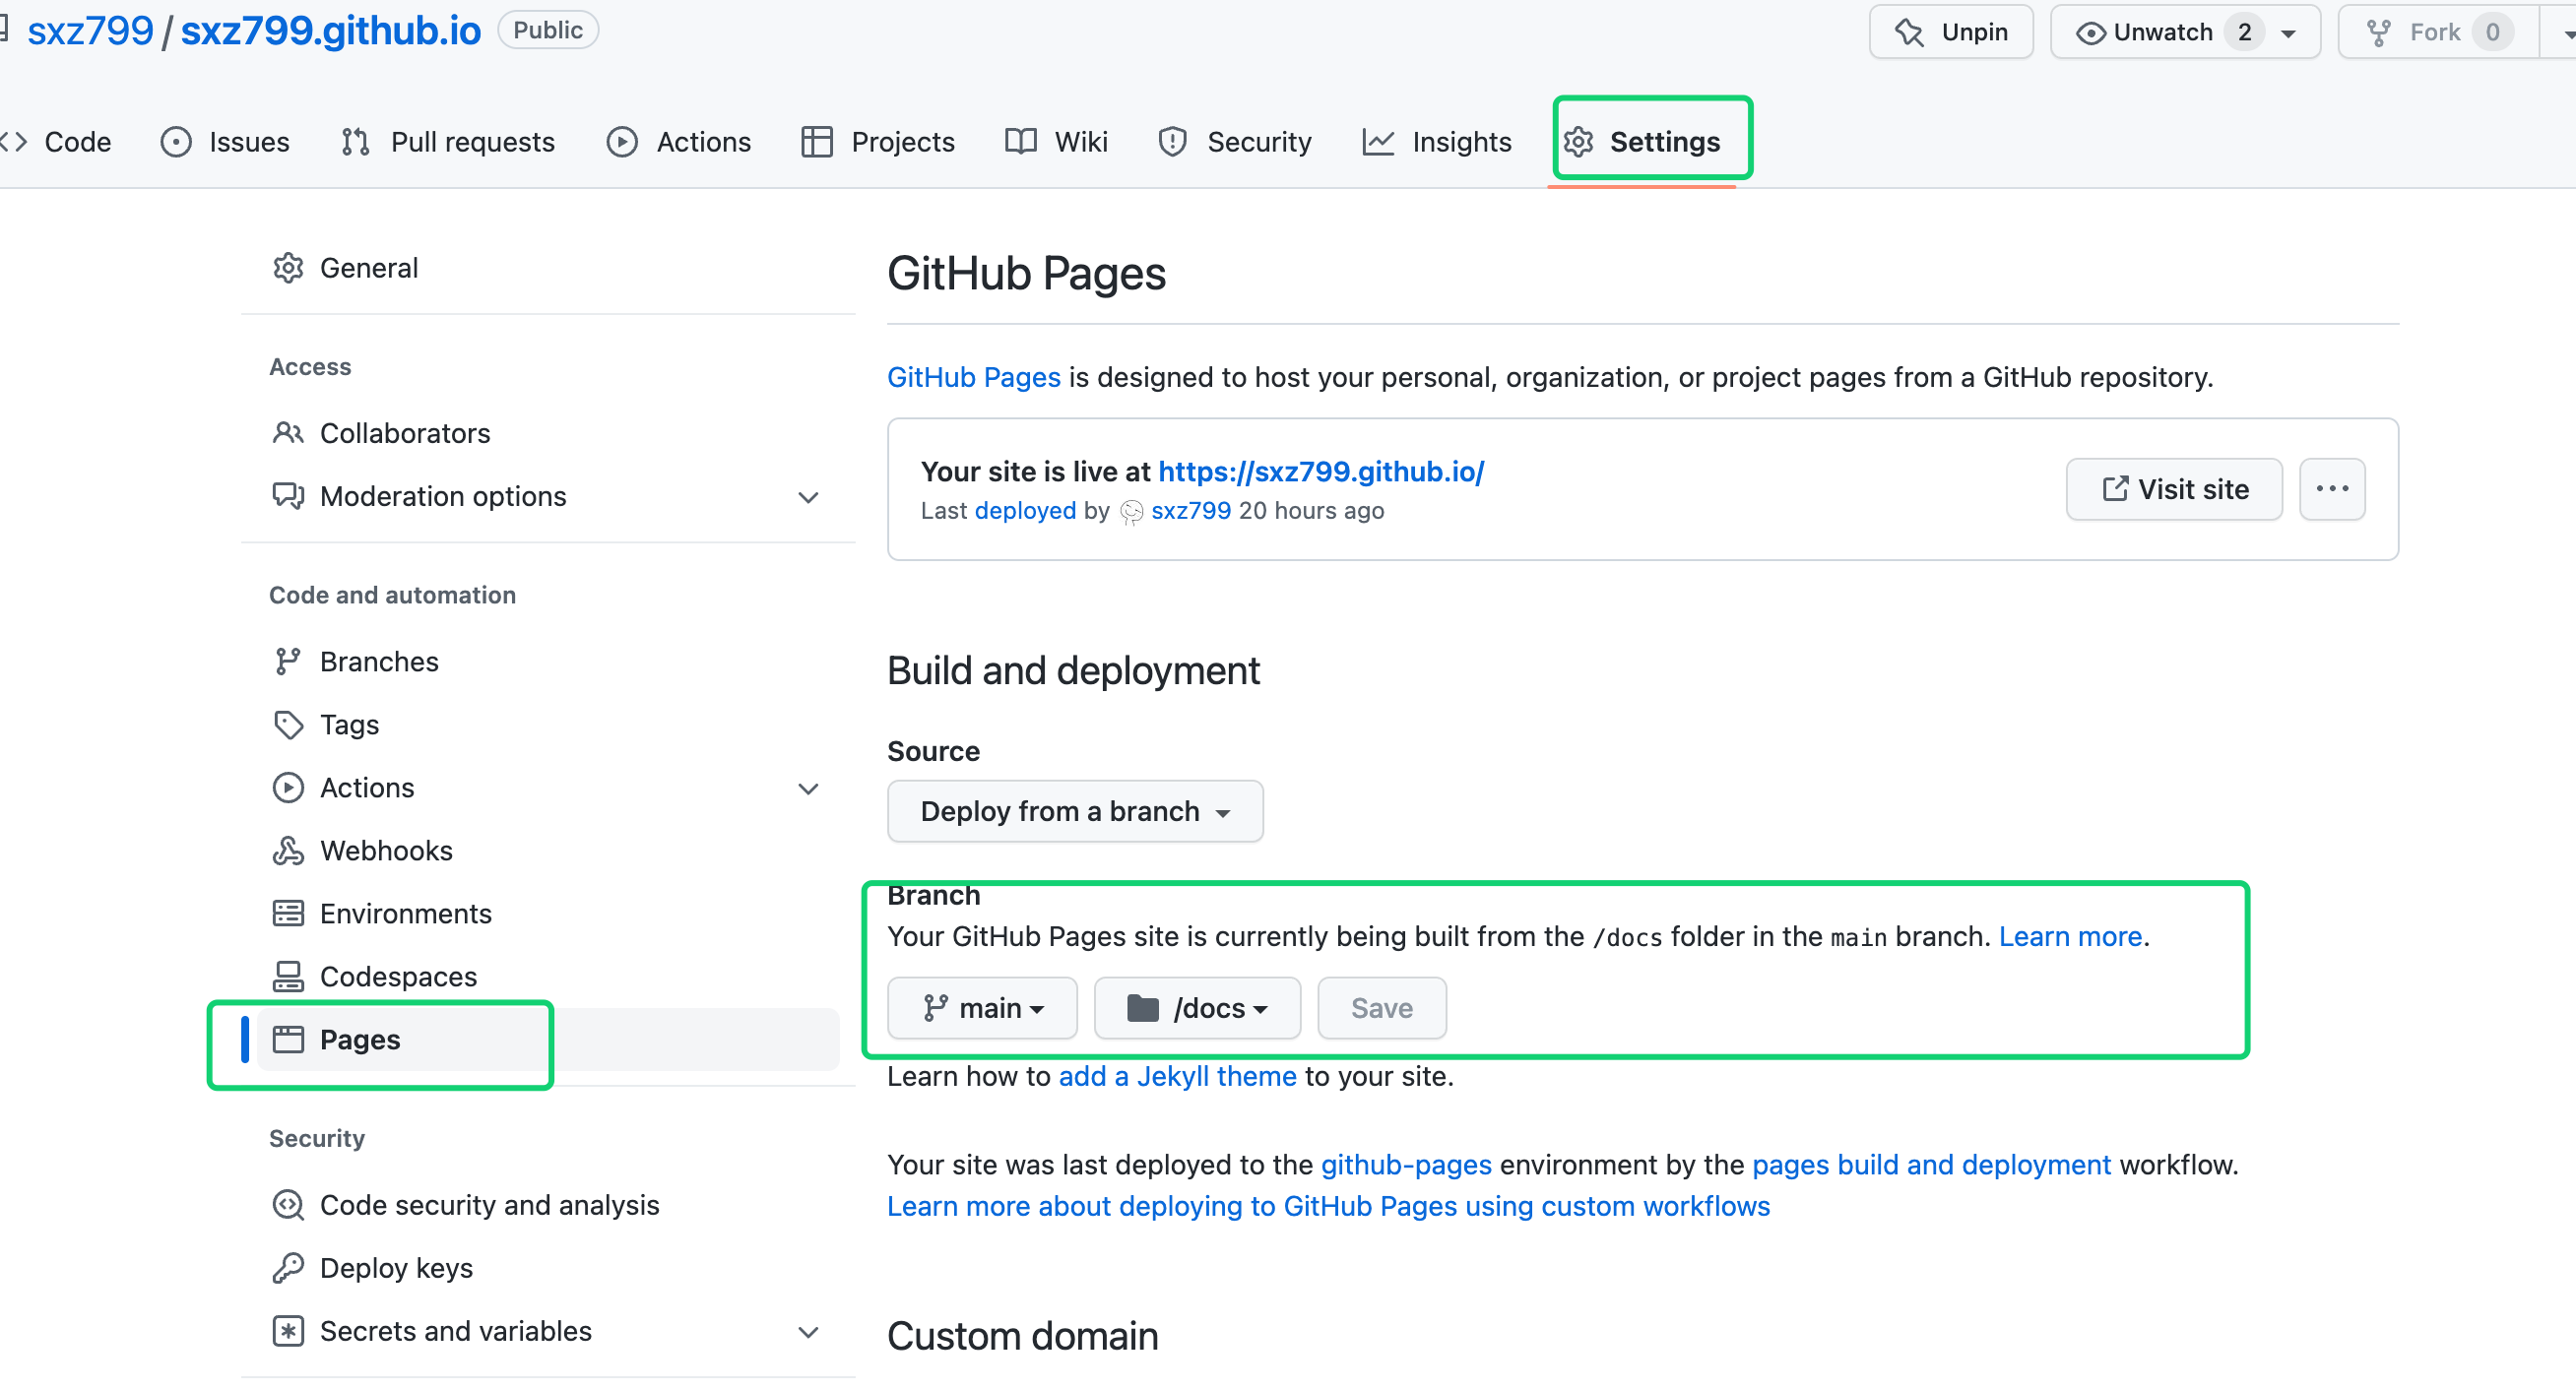
部署到github page
修改hugo配置文件,使生成的前端文件放到docs目录
 1
 2
 3
 4
 5
 6
 7
 8
 9
10
11
12
13
14
15
16
17
18
19
| # ===============================================================
# 根据如下的配置说明完善自己的站点配置,建议另外拷贝进行调整避免冲突
# Improve your site configuration according to the following
# configuration instructions. It is recommended to make
# additional copies for adjustment to avoid conflicts
# ===============================================================
# ---------------------------------------------------------------
# Hugo 引擎的基础配置
# Basic configure for Hugo engine
# ---------------------------------------------------------------
# 使生成的前端文件放到doc目录
publishDir : docs
# 站点域名,比如: https://hugo-next.eu.org
# Website domain, eg: https://hugo-next.eu.org
baseURL: /
# 站点标题
# Website title
|
github创建一个仓库 username.github.io username为你的用户名

将hugo生成的站点推送到新建的仓库
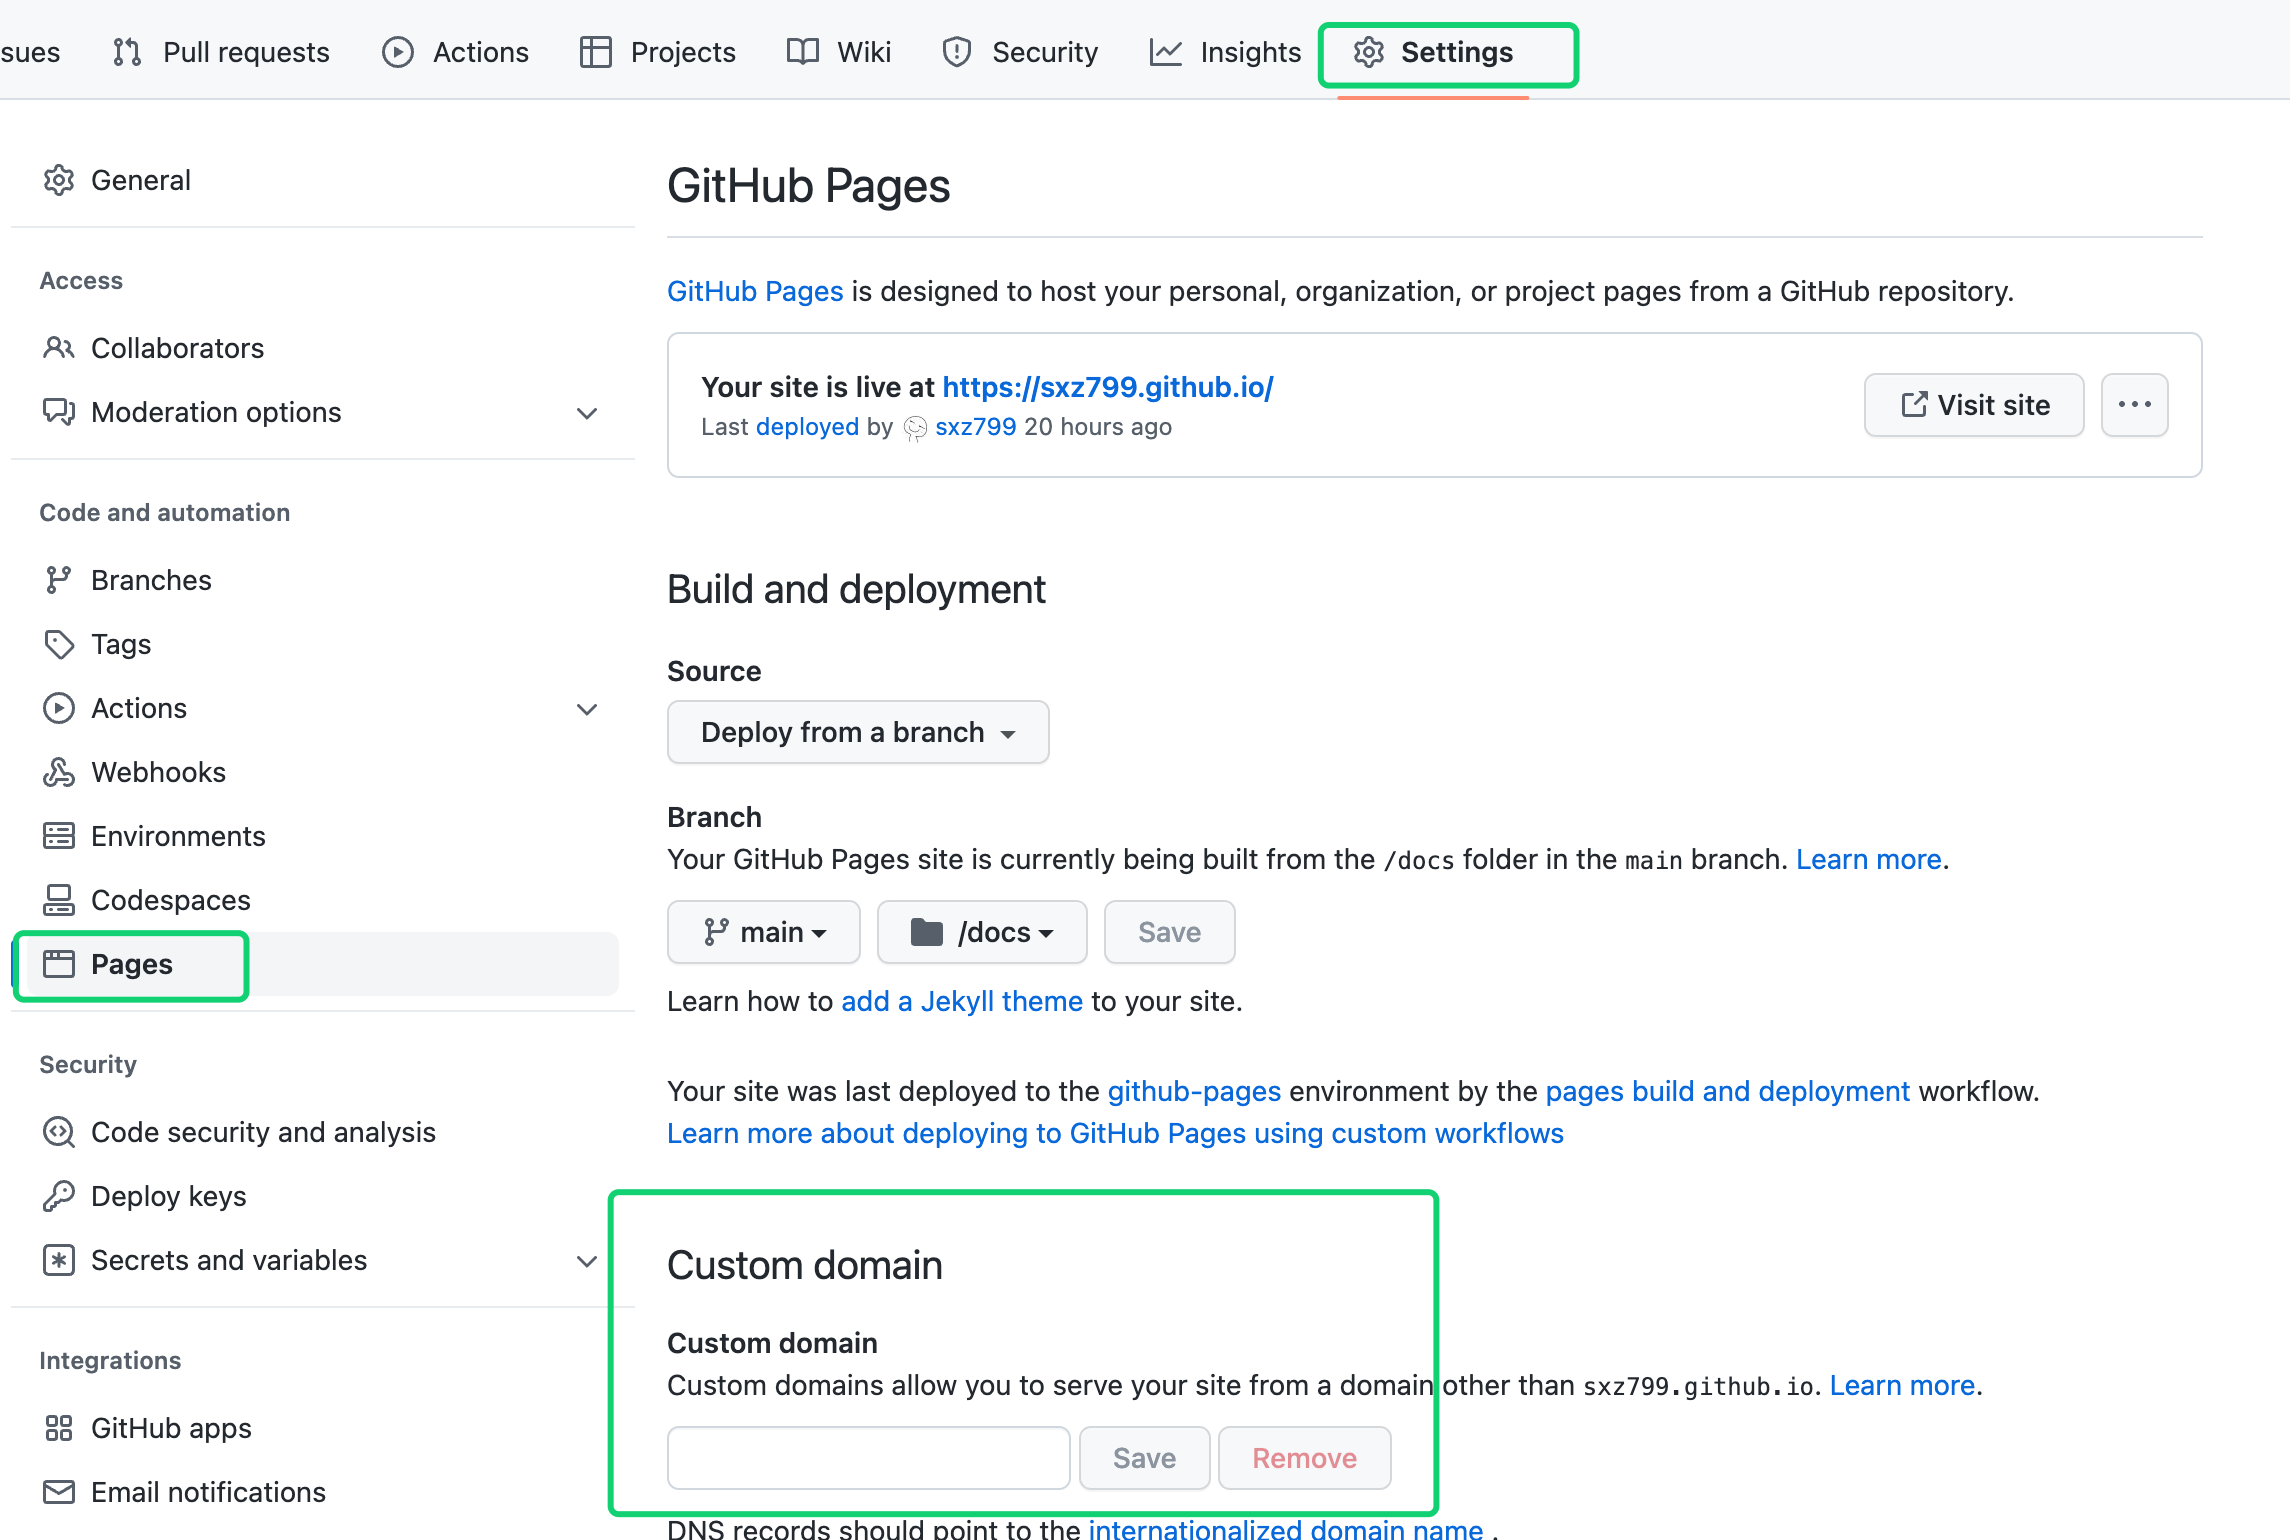
配置域名解析
在docs目录中创建一个CNAME文件内容为你的域名
 1
 2
 3
 4
 5
 6
 7
 8
 9
10
| rm -rf docs/ # 删除旧的文件
hugo #编译出新文件
echo 'blog.sxz799.asia' > docs/CNAME ## 如果配置的域名就加上这个
git add .
git commit -m "update blog"
git push
|